Use Octaves to Break Out of Your Pentatonic Box
Almost every one of us learns the same shape first. Position 1 minor pentatonic. It’s the box, it works, it sounds good, and it’s where about 90% of us get stuck for years.
I’m going to show you a way out that doesn’t require memorizing all five positions first. We’re going to use octaves to walk one tiny shape up the neck, and by the end you’ll have the entire pentatonic scale across three octaves using one repeating pattern.
Here’s the wild part.. it’s the SAME shape every time. That’s why a lot of the shreddier guys use it. You don’t have to think.
Everything below is in A minor, starting at the 5th fret. Move it anywhere once you’ve got it.
First, find your octaves
We’re borrowing a little bit of CAGED for this. Just enough to get us where we’re going, I promise.
Start with the E shape barre chord. Take a basic open E chord and ask yourself where the octaves are. Your root is on the bottom, the low E string. Your next E is on the 2nd fret of the D string. That’s down two strings, over two frets. Your last one is up top on the high E string.
Now barre that shape at the 5th fret and you get this:
- 5th fret, low E string
- 7th fret, D string
- 5th fret, high E string
That’s two of the three octaves we need. The third one comes from the D chord.
Look at an open D chord. You’ve got the open D string, and your octave is on the 3rd fret of the B string. Same relationship, different math: down two strings, over three frets.
So take that A on the 7th fret of the D string, go down two strings to the B, over three frets, and you land on the 10th fret of the B string.
Those are our three anchor points:
- 5th fret, low E
- 7th fret, D string
- 10th fret, B string
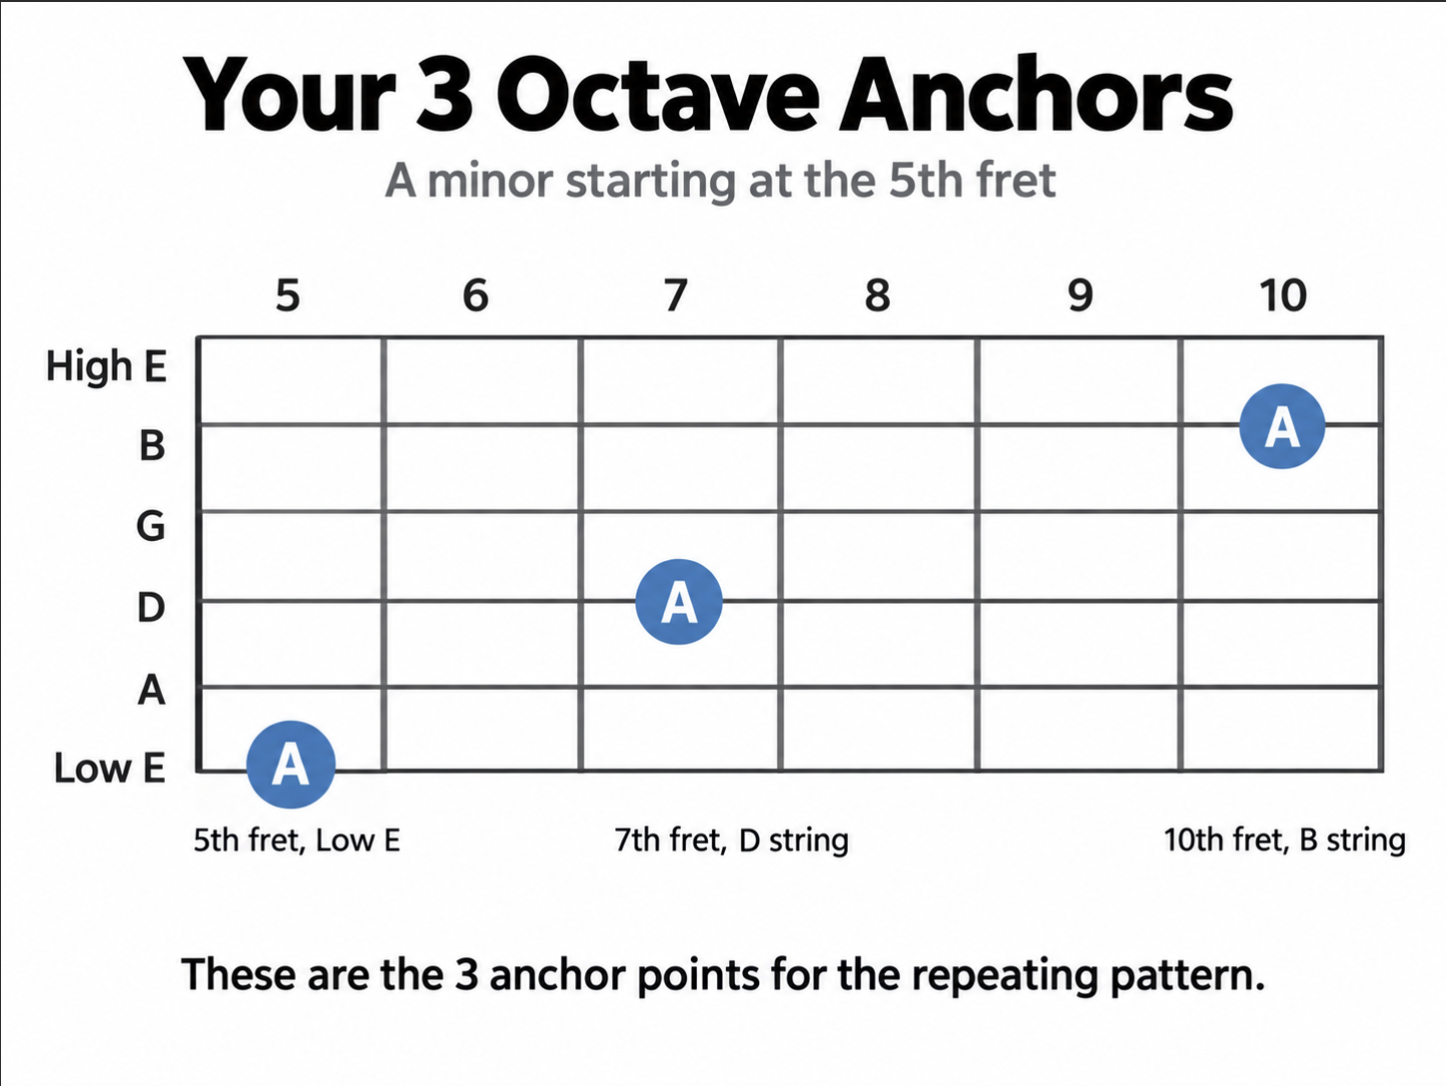
Everything else hangs off of those.
The Guitar Newsletter That Doesn’t Suck
Free every week: licks to steal, gear talk, rock trivia with prizes, guitarist spotlights, and more.
Now take four notes
From your position 1 pentatonic, we’re only grabbing four notes to start.
e|--------------
B|--------------
G|--------------
D|--------------
A|----------5--7
E|--5--8--------
1, 2, 3, 4. That’s it. Fifth and eighth on the low E, fifth and seventh on the A.
Look at the spacing, because the spacing is the whole trick. Three frets on the first string, then two frets on the next one. A whole plus a half, then a whole step.
Now move up to your octave on the 7th fret of the D string and play the exact same thing.
e|--------------
B|--------------
G|----------7--9
D|--7--10-------
A|--------------
E|--------------
Three frets, then two frets. Identical.
And again at the 10th fret of the B string.
e|-----------10--12
B|--10--13---------
G|-----------------
D|-----------------
A|-----------------
E|-----------------
Three frets, two frets. Same shape, third time.
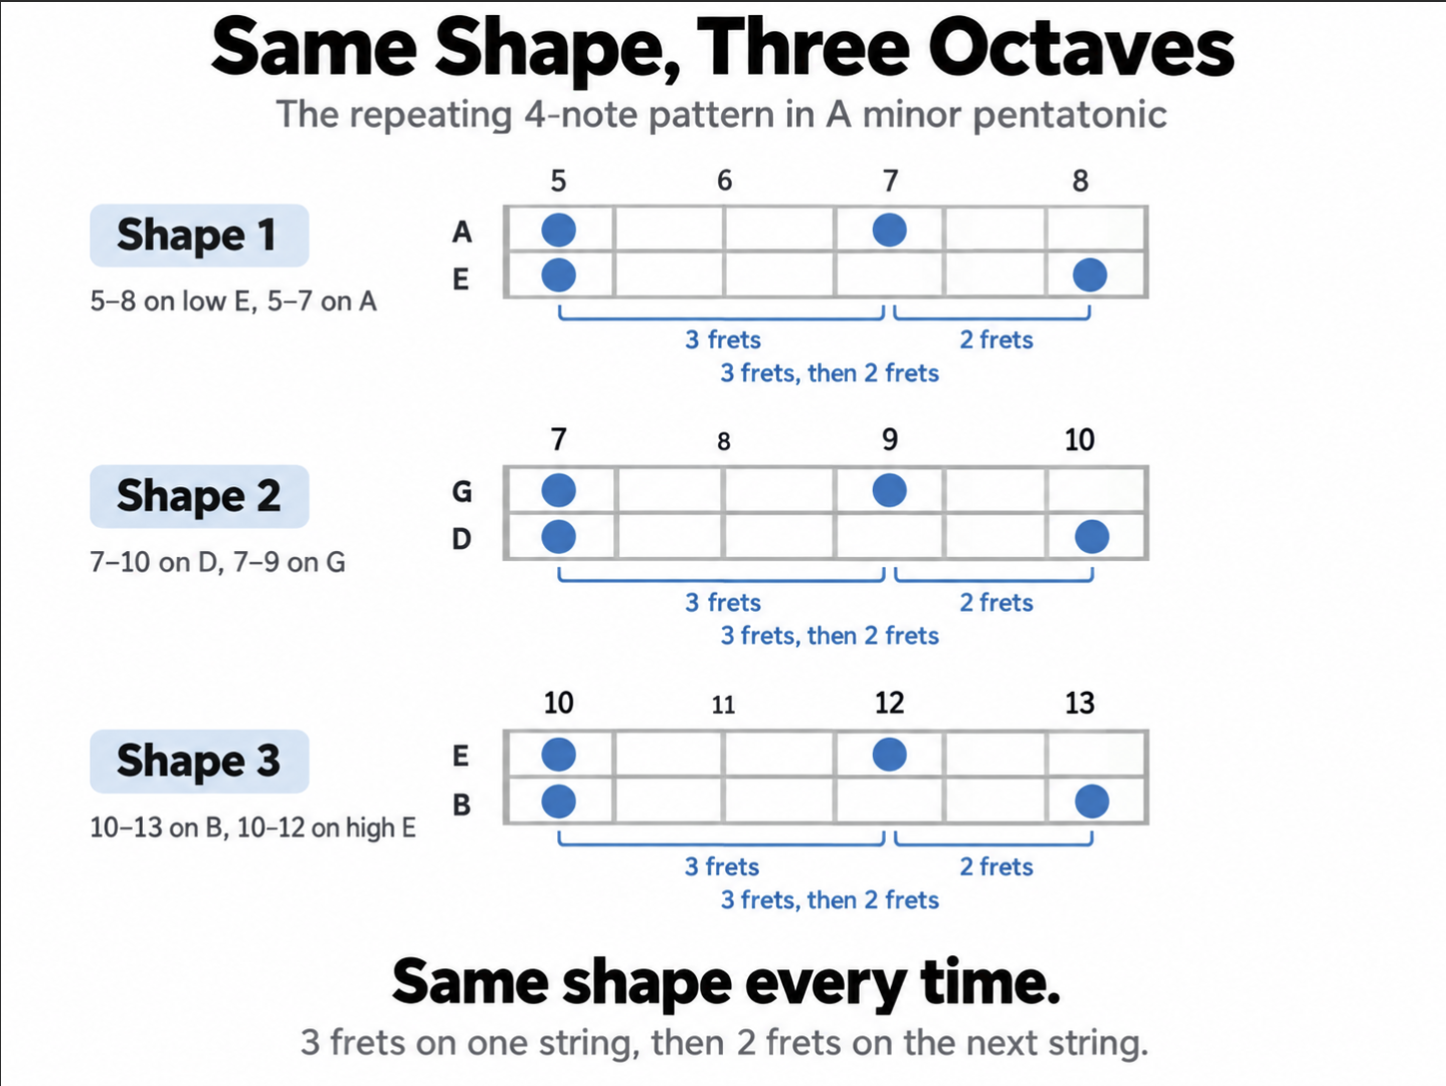
Really, really cool. And notice where you ended up.. you’re WAY outside the box you started in.
Add one note and you’ve got the whole scale
Four notes is only four notes. The pentatonic has five. So we add one.
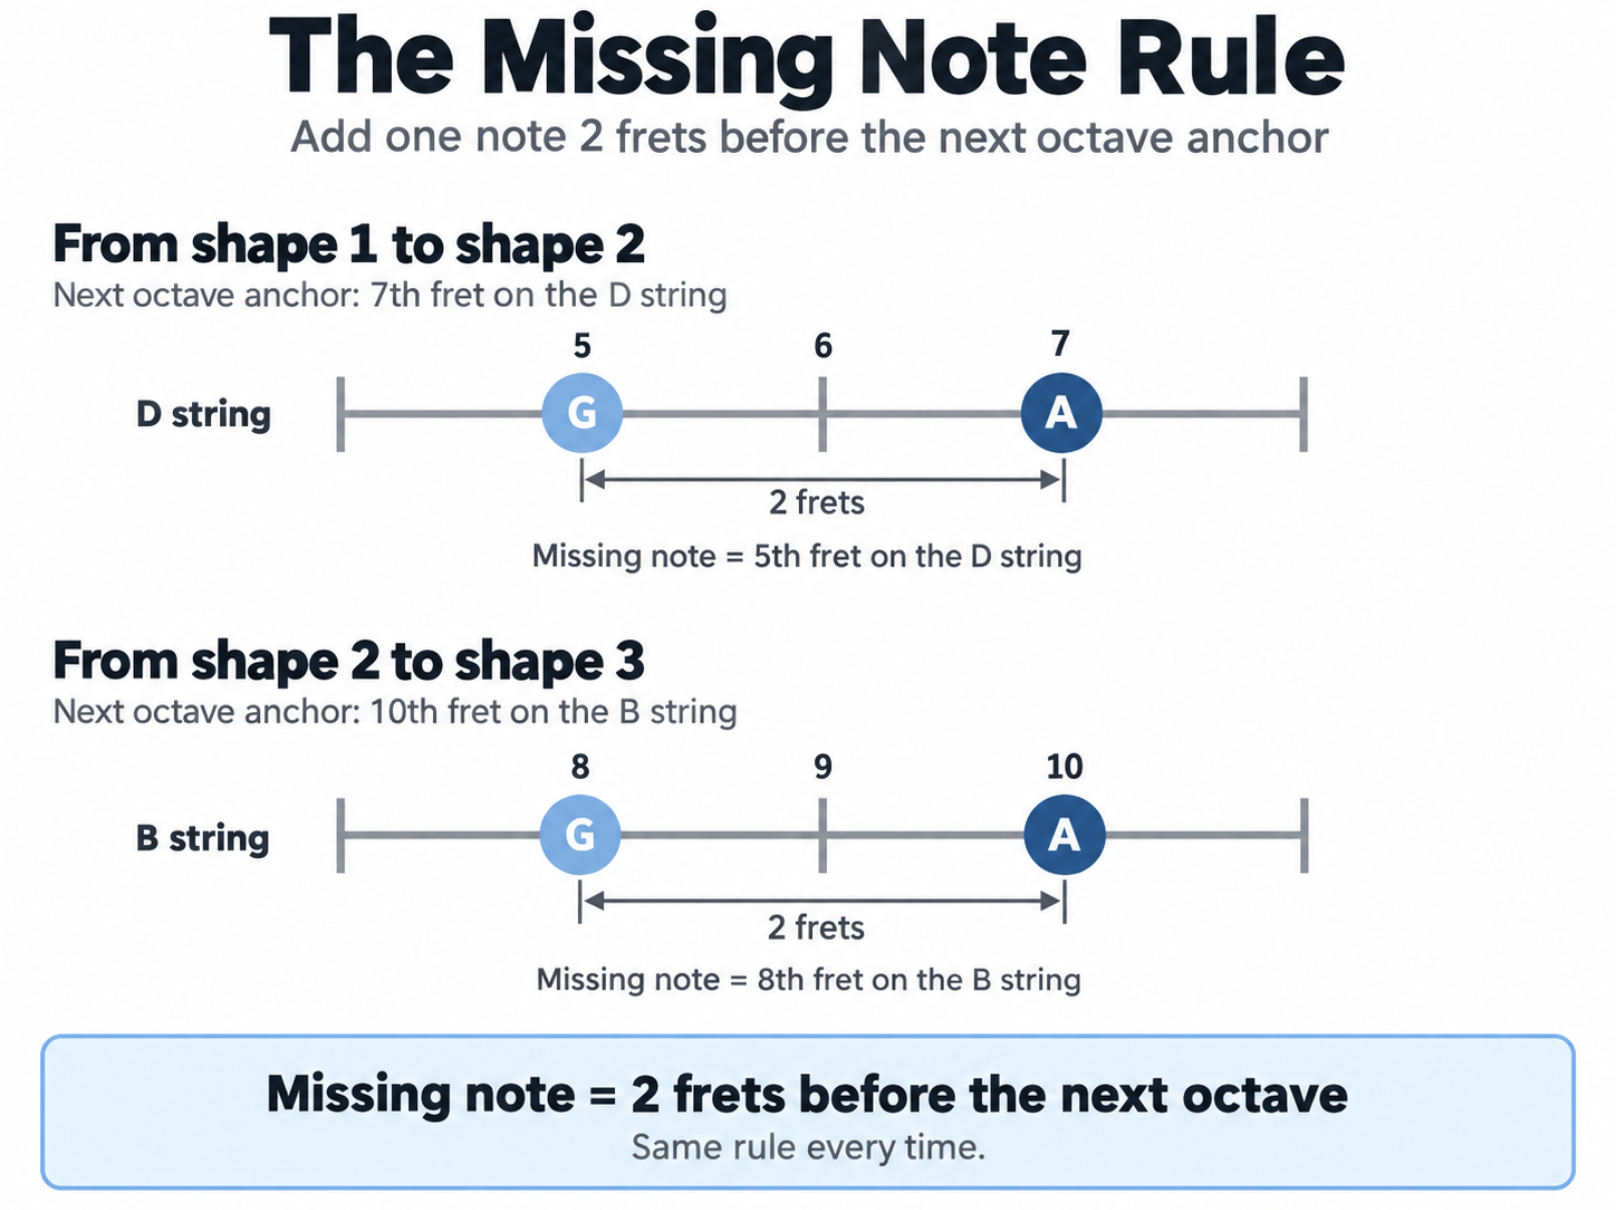
That missing note is always a whole step behind the next octave. Two frets back from your next anchor point.
Going from the first shape to the second, your next octave is the 7th fret of the D string, so the extra note is the 5th fret of the D string. Going from the second shape to the third, your next octave is the 10th fret of the B string, so the extra note is the 8th fret of the B string.
That’s it. Same rule every time.
Put it all together and here’s the entire A minor pentatonic across three octaves:
e|---------------------------------------10--12
B|-----------------------------8--10--13-------
G|--------------------7--9---------------------
D|---------5--7--10----------------------------
A|--5--7---------------------------------------
E|--5--8---------------------------------------
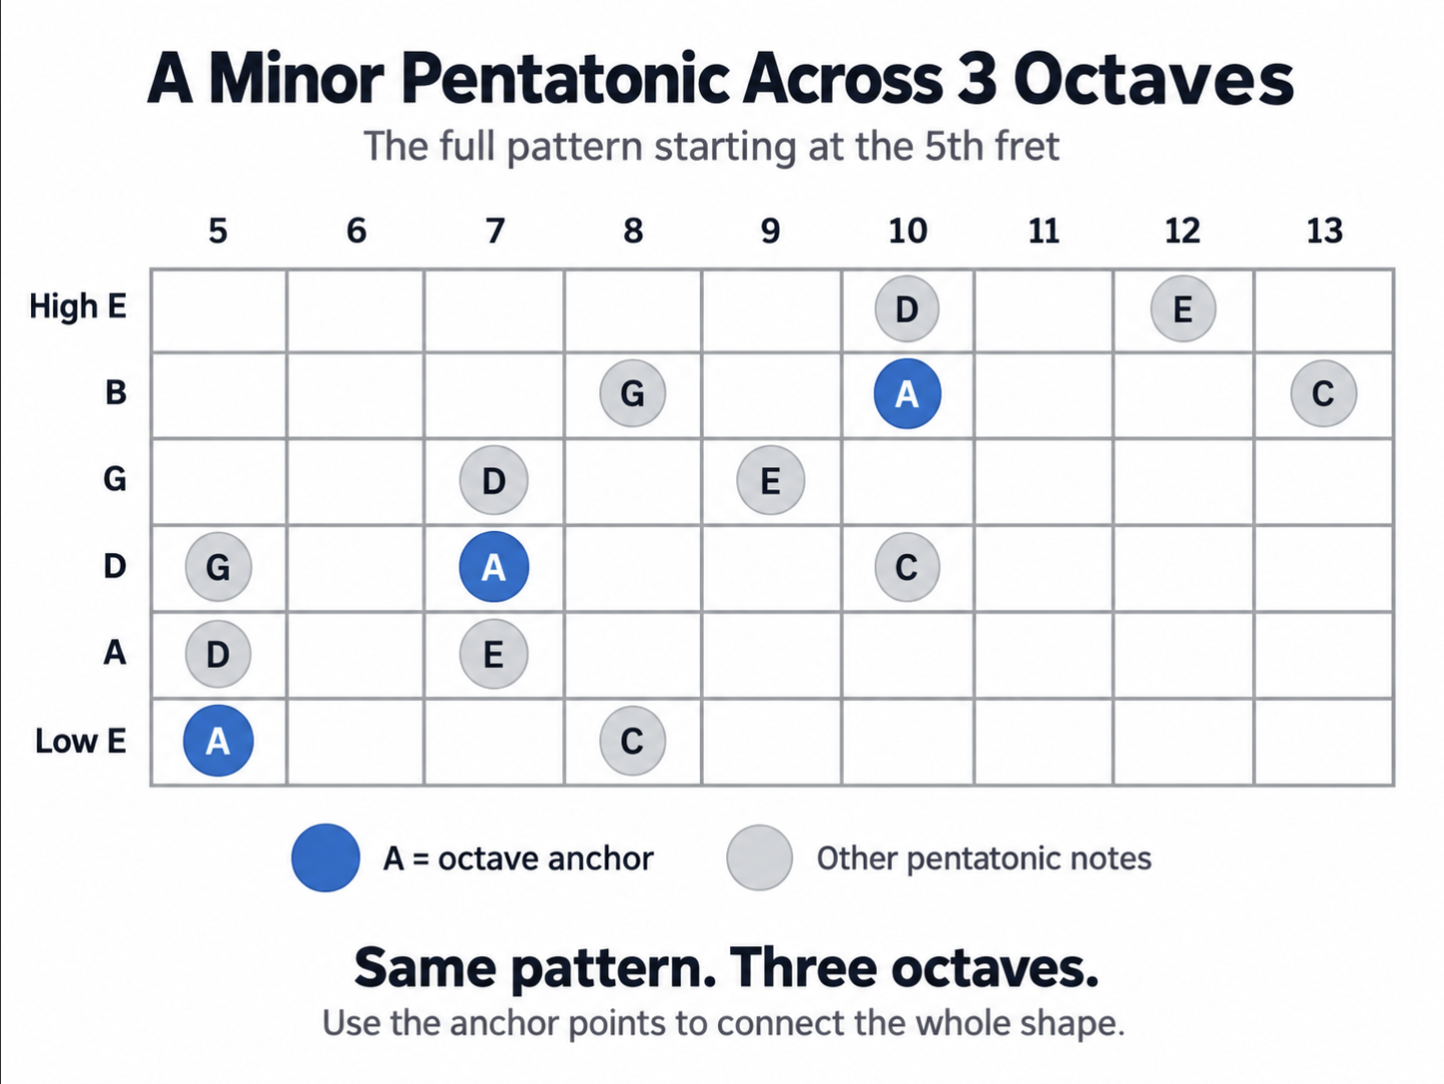
You can also throw the 3rd fret of the low E on the front if you want the low G, which is the fifth note you were missing down in that first spot.
I’d actually learn this one backwards first. Start with the top shape up at the 10th fret, work your way down, and you’ll see the visual of it faster. Once it’s in your head going down, going up makes sense immediately.
Where this puts you
Play that top shape and take a look at where your hand is. You’re sitting right around position 3, or just above it.
Ideally you learn all five positions. Nobody’s getting out of that. But until you get there, this is a really good vehicle for moving through your scales instead of camping out at the 5th fret for the rest of your life.
It works on other scales too
You can do this with the major scale and with your full minor scale.
The rule stays the same: stick with five notes.
1, 2, 3, 4, 5. Then move to the octave and do it again.
If you go to six notes it stops working. It doesn’t complete the scale and it doesn’t settle on a resolving note. It works conceptually, and you can hear what you were going for, but it just doesn’t sound as good as the five does. Trust me on this one and stay at five.
One thing about your fretting hand
When you’re going up, your index finger is the anchor. Everything pivots off of it.
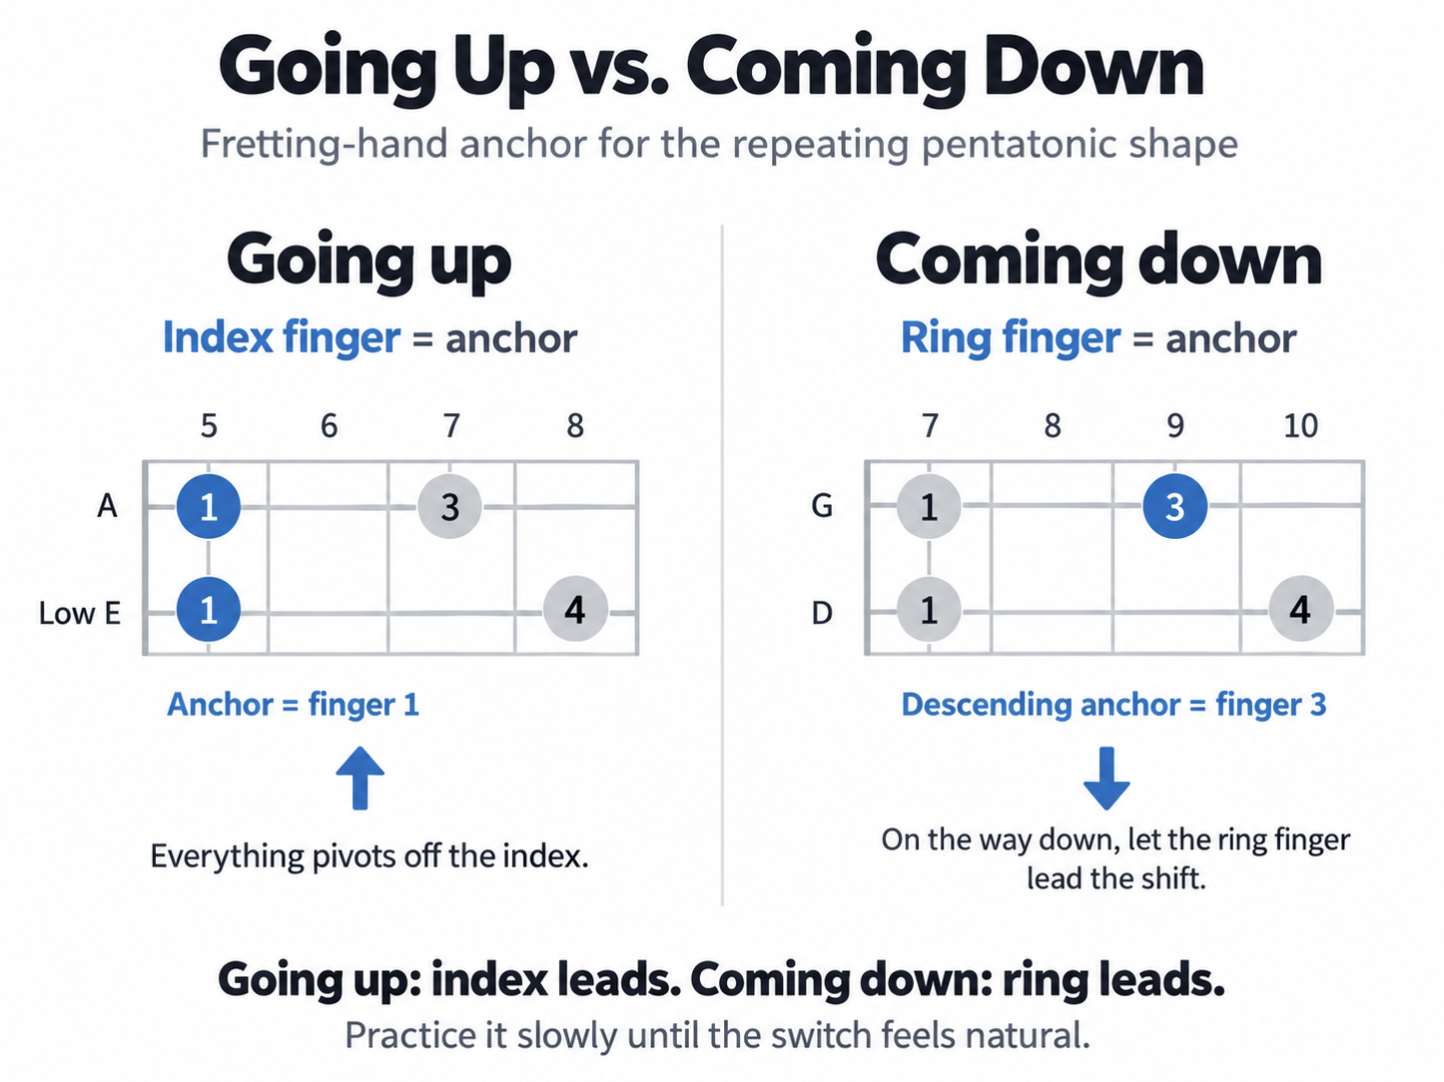
When you come back down, it has to be your ring finger.
That switch feels awkward the first few times through. It’s supposed to. Practice it up and down slowly and it smooths out like anything else does, and then you’ve got a shape you can fire off anywhere on the neck without thinking about it.
Get it fast enough and you’ve got a pretty great speedy little lick to move between registers in a solo.
Run this up and down this week. Play it over an Am vamp and force yourself to leave position 1. That’s the whole point.
If you’ve got questions, join our guitar community here!
The Guitar Newsletter That Doesn’t Suck
Free every week: licks to steal, gear talk, rock trivia with prizes, guitarist spotlights, and more.